Enterprise Volume Management System
Documentation
- Installation
- Terminology
- Converting To EVMS
- User Guide
- Frequently Asked Questions
- Architecture Overview
- Clustering Design
- Papers and Presentations
Screen Shots
Downloads
- EVMS Files
- EVMS CVS Tree
- Extra Patches
- Debian Packages
- Mandrake Packages
- Gentoo Packages
- User Contributions
Text-mode Screen Shots
Here are some screen shots of the EVMS Text-mode (Ncurses) User Interface.

|
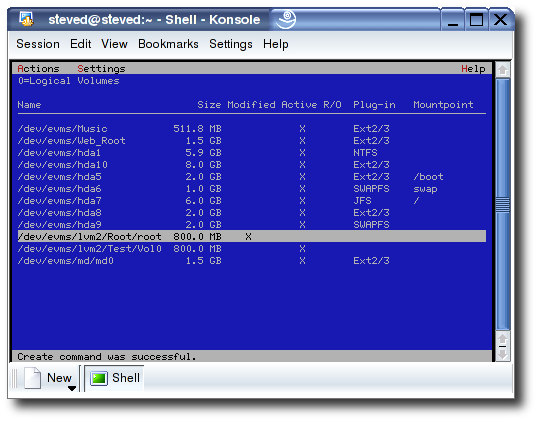
Logical Volumes: The first panel displayed, panel 0, shows the logical volumes. |

|
Actions Menu: The main volume panel, with the "Actions" and "Create" pull-down menus selected. |

|
Creating a New Region: Select "Actions->Create->Region" from the pull-down menu. Then select the desired plug-in by highlighting the plug-in and pressing the space bar. This example will be creating a new LVM2 region. |
|
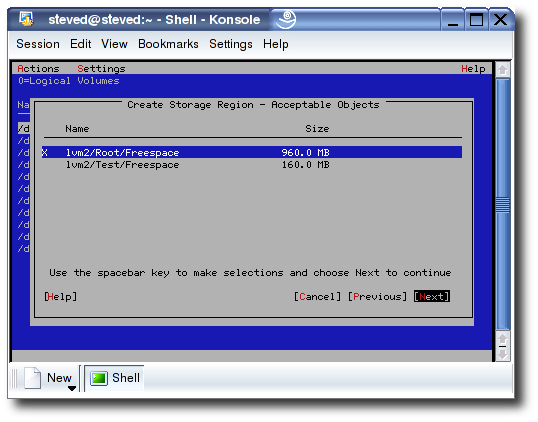
Selecting Objects: After selecting the desired plug-in, a list of acceptable objects is displayed. For LVM2, this is a list of regions representing the freespace in each of the containers. Select the Root container. |
|
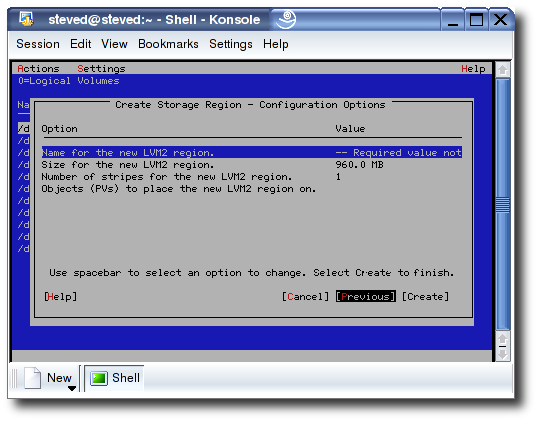
Options for the New Region: The options for the new region are shown. The name for the LVM2 region is required. To set the option, highlight the option and press the space bar. |

|
Options for the New Region: Enter the name for the new region and press Enter. |

|
Options for the New Region: The region size can be set in the same way. |

|
Options for the New Region: The options are now set. Press Enter to create the region. |
|
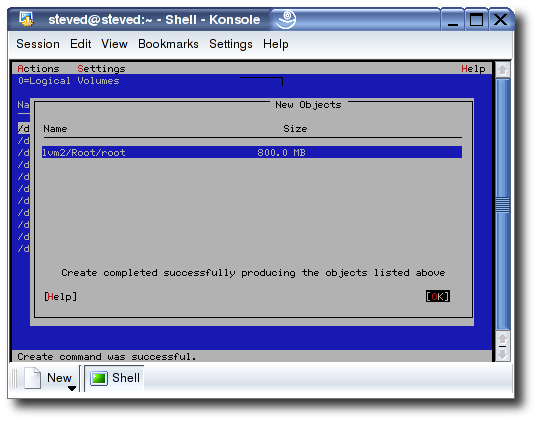
Create Region Result: Region creation was successful. |
|
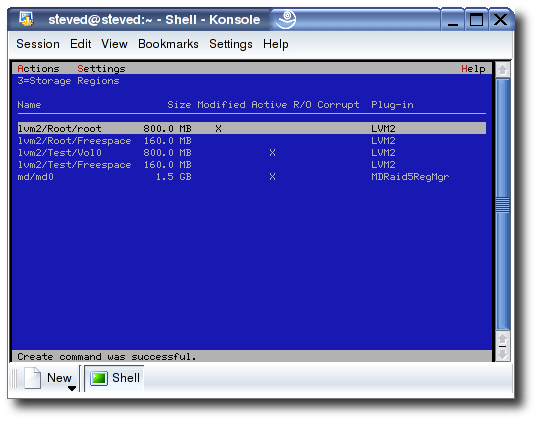
Create Region Result: Go to the "Storage Regions" panel, panel 3, either by pressing Tab to cycle through the panels or by pressing '3' to go there directly. The new region appears on the panel. |

|
Create Compatibility Volume: Highlight the new region and press Enter. A context menu displays what actions are available for the region. Select "Create Compatibility Volume" to make this region accessible as a volume. |
|
Volume View: Go back to the volume panel, panel 0, by pressing Tab until you get there or by pressing '0' to go there directly. The newly created /dev/evms/lvm2/Root/root volume appears. It will be marked as "Modified" until changes are saved to disk. |
|
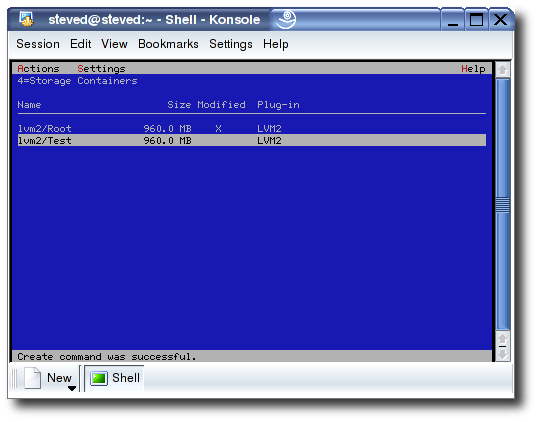
Container View: Go to the container panel, panel 4, by pressing Tab until you get there or by pressing '4' to go there directly. The "Container" panel shows two LVM2 containers (VGs), Test and Root. |

|
Container Details: Highlight lvm2/Test, press Enter to get the context menu, then select "Display Details". A window appears with a variety of information about that container. In the lower right is says "More..." which means there are more lines if you scroll down. |

|
Container Details: The "Number of Objects (PVs)" line has a '+' in front of it which means there is more information about that item. Highlight the item and press the space bar to see the additional information. |

|
Container Details: The additional information lists the objects consumed by the container. "hdd9" has a '+' in front of it. Highlight "hdd9" and press the space bar to see extra details about the first object in this container. |

|
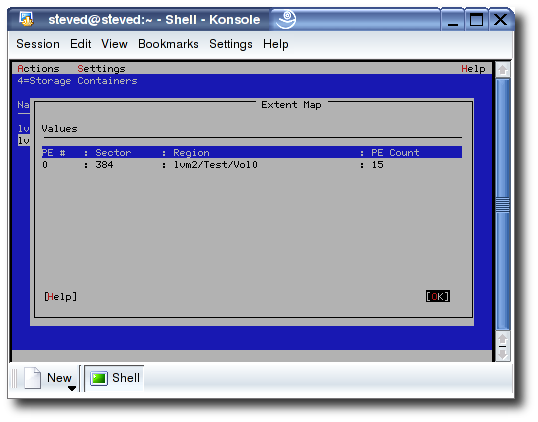
Container Details: The LVM2 plug-in displays information about the first PV. "Extent Map" has a '+' in front of it. Highlight "Extent Map" and press the space bar to examine the physical to logical mappings for this object. |
|
Container Details: The physical to logical mapping is displayed. |

|
Another Create Example: Now let's create another new region, this time using the RAID-5 plug-in from the MD region manager. |

|
Selecting Objects for RAID-5: Select four segments to include in the new RAID-5 region. (In general, with RAID, you will want to use whole disks, or at least segments that are all on different disks.) |

|
Options for the new RAID-5: For this new region, we can choose to add a spare to the array, we can set the chunk size, decide whether we want RAID-5 or RAID-4, and pick the type of parity algorithm to use. |

|
MD Region Details: After creating this new RAID-5 region, we can display its details. |

|
Creating a Snapshot: Now let's create a snapshot of the "Music" volume. Select "Actions->Create->Feature Object" from the drop-down menu. Then select the "Snapshot Feature" from the list. |

|
Options for a new Snapshot: After selecting the desired backing-store for the snapshot, you are presented with the options for creating a snapshot object. The volume to be snapshotted and the name of the snapshot object are required. |

|
Options for a new Snapshot: The snapshot options are set. Press Enter to create the snapshot object. |

|
Creating an EVMS Volume: After the snapshot object has been created, go to the "Feature objects" panel, panel 2, highlight the snapshot object and press enter to get the context menu. Create an EVMS volume from the snapshot object. |
|
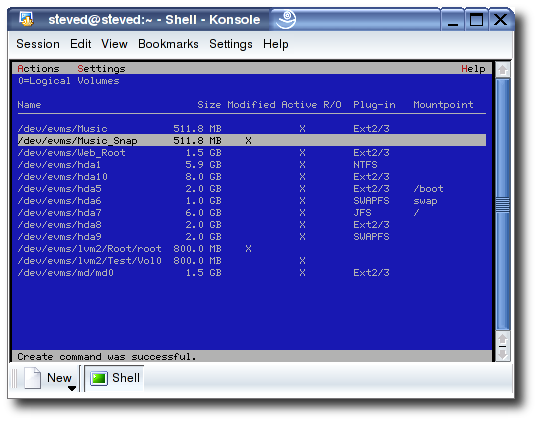
Volume View: The "Volumes" panel once again, after creating the snapshot volume "Music_Snapshot". |

|
Snapshot Details: Back on the Feature Object panel, highlight the "music_snap" object press Enter and select "Display Details" to get the information window about the snapshot volume. You can see additional information about the snapshot volume including how full the snapshot is. |

|
Save Changes: None of the new volumes and objects created have been written to disk until you select "Actions->Save..." from the pull-down menu. |

|
Save Details: You can select "Details" on the Save panel to view all of the changes that will be saved. |